 Birch Bay Roofing
 Asphalt Shingle Roofing Built for Lummi Island's Climate and Access
Lummi Island sits out in the water off Whatcom County, and that location cuts both ways for a roof. The setting is part of what makes the island worth living on, but it also means homes there take on marine weather that mainland Birch Bay properties feel in a milder form. Salt-laden air works steadily on exposed metal and fasteners. Wind-driven rain doesn't just fall straight down — it gets pushed sideways and upward under shingle edges that a rushed installation never accounted for. And a long, damp moss season settles into shaded roof slopes and stays there for months at a time. On top of all that, the island is reached only by ferry, which changes how a roofing job needs to be planned and staged, not just what materials go on the roof.
Asphalt shingle roofing is still the right choice for the large majority of Lummi Island homes — it's proven, cost-effective, and easy to repair in sections when something does go wrong. But that only holds true when the installation is planned around the specific stresses of this location and the practical realities of doing the work on an island. This page covers what a correct asphalt shingle install or replacement looks like here, and why the process runs a little differently than it would on a mainland Whatcom County lot.
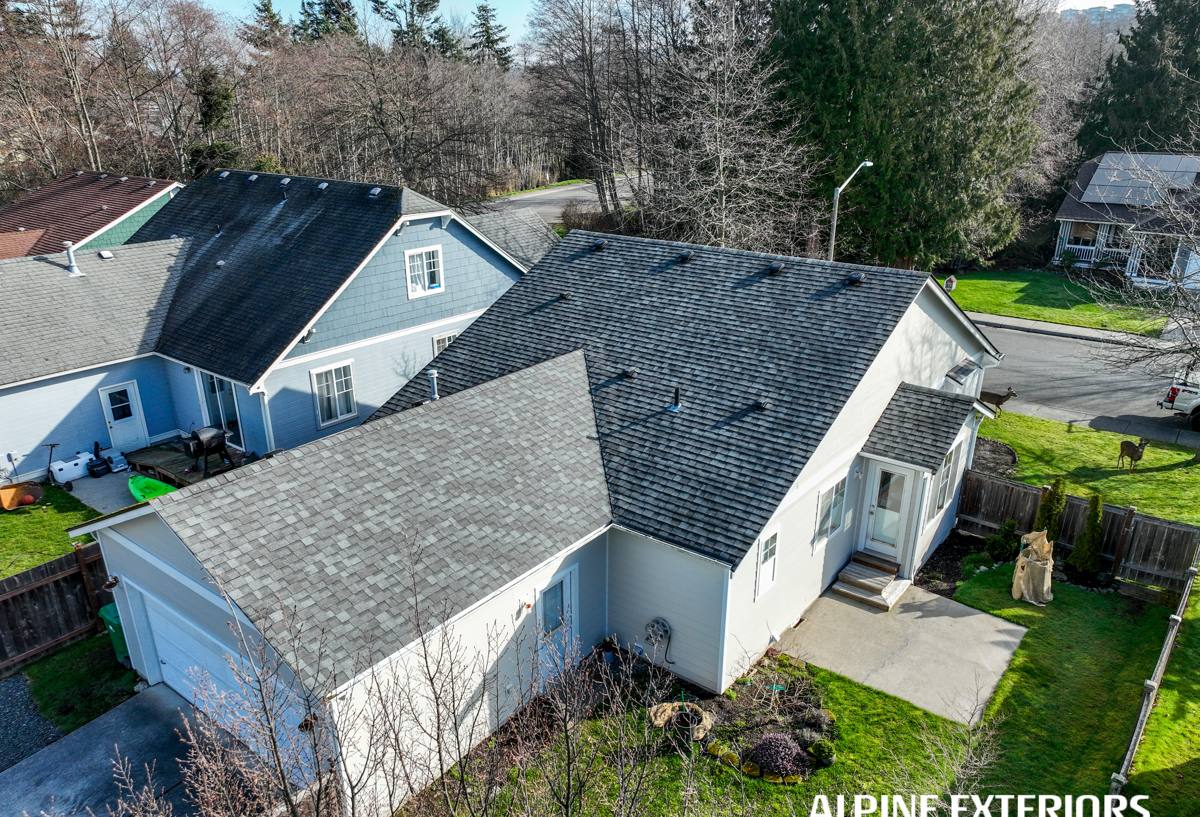
Why Asphalt Shingles Still Make Sense on Lummi Island
Asphalt shingles remain the most common roofing material for good reason: they perform well in this climate when installed correctly, cost less upfront than metal or tile, come in a wide range of colors and profiles, and can be repaired section by section rather than requiring a full replacement after storm or wind damage. What varies enormously — on Lummi Island as much as anywhere — is installation quality. A shingle roof's real-world lifespan has far more to do with the underlayment, fastening pattern, and flashing detail underneath it than with which brand name is printed on the wrapper.
That gap matters even more here because a roof failure on an island isn't a same-day fix. Getting a crew, a dumpster, and a truckload of material back onto Lummi Island for an emergency repair takes real lead time. A roof installed correctly the first time avoids that problem entirely; one installed with shortcuts tends to surface its flaws at the worst possible moment.
What Local Conditions Actually Demand
- Corrosion-resistant fasteners and flashing metal: Marine air accelerates corrosion on undersized or bargain-grade metal, and a corroded flashing joint is one of the most common places a roof starts leaking years later.
- Wind-driven-rain-rated underlayment: Standard felt underperforms synthetic or self-adhered underlayment when rain is being pushed sideways and up rather than falling straight onto the roof plane.
- Algae-resistant shingle granules: Shaded, tree-covered, and north-facing roof sections on the island hold moisture long enough to grow visible moss and algae streaking within just a few years on standard shingles.
- Balanced attic and roof ventilation: Moisture trapped under the roof deck accelerates rot and feeds moss growth from underneath, working against the roof from the inside out.
- Full material planning before the ferry, not after: Every fastener, flashing length, and shingle bundle needs to be accounted for and brought over in the initial trips — a forgotten item isn't a quick run to the supply house when the job site is across the water.
What a Correct Asphalt Shingle Install Involves
A roof replacement is more than laying new shingles over what's already there. Done right, it treats the roof as a full system, from the deck up.
Tear-Off and Deck Inspection
A complete tear-off to the decking is the only reliable way to find hidden moisture damage, soft spots, or rot that's developed under the old shingles — often invisible from inside the attic until it's advanced well past a simple fix. Layover installs skip this step and bury whatever problems already exist under a fresh layer of shingles, which is a particularly bad trade-off on a property where a follow-up repair means scheduling another trip to the island.
Underlayment
Synthetic or self-adhered underlayment gives the shingle field a real secondary water barrier, which matters directly in a location where wind-driven rain gets forced under shingle tabs instead of simply running off. Ice-and-water shield at eaves, valleys, and other vulnerable transitions adds another layer of protection exactly where water is most likely to find its way in.
Flashing at Valleys, Chimneys, and Walls
Most roof leaks in this region start at flashing details, not out in the open field of shingles. Valleys where two roof planes meet, chimney and skylight penetrations, and wall-to-roof transitions all need flashing that's properly lapped, sealed, and integrated with the underlayment beneath it — not caulked over as an afterthought once the shingles are already down.
Fastening and Wind Rating
Correct nail placement and count, following manufacturer specification rather than a faster shortcut pattern, is what keeps shingles from lifting in exposed wind. That matters on any Lummi Island roof with open-water exposure or elevation, where wind loads run higher than on a sheltered inland lot.
Ventilation
Balanced intake and exhaust ventilation keeps the underside of the roof deck dry, which extends shingle life and starves the moisture that feeds moss growth from below. A roof that looks fine from the ground can still be shortening its own life through poor attic airflow that nobody sees.
Comparing Shingle Options for a Lummi Island Roof
| Shingle Type | Typical Lifespan | Fit for Lummi Island Conditions |
|---|---|---|
| 3-Tab Shingles | 15-20 years | Lowest upfront cost, but the thinner profile and lower wind rating make it a tougher fit on exposed, water-facing lots |
| Architectural (Laminated) Shingles | 25-30 years | Heavier construction and better wind resistance; the practical default for most homes on the island |
| Premium/Designer Shingles | 30+ years | Stronger algae resistance and heavier build, worth considering on shaded or moss-prone slopes and roofs you don't want to think about again soon |
For most Lummi Island homes, architectural shingles with algae-resistant granules are the right balance of upfront cost and long-term performance given the wind exposure and moss pressure here. Whether a premium tier is worth the extra cost depends on the roof's orientation, tree cover, and how long you plan to own the home.
Cost Factors Worth Understanding for an Island Job
Bids for what looks like the same roof can differ by thousands of dollars, and on Lummi Island the gap comes from real differences in both scope and logistics — not just one contractor padding a number.
| Factor | What It Affects |
|---|---|
| Tear-off vs. layover | Whether hidden deck damage gets found and fixed before new shingles go on |
| Underlayment grade | How well the roof resists wind-driven rain intrusion |
| Shingle grade and wind rating | Expected lifespan and resistance to lifting in exposed, open-water conditions |
| Flashing scope | How thoroughly valleys, chimneys, and wall intersections are addressed |
| Ferry and staging logistics | How much material, equipment, and crew time get planned into fewer, well-organized trips instead of costly repeat crossings |
| Roof pitch and access | Labor time, staging, and safety requirements on top of everything else |
A detailed written estimate that itemizes these components tells you far more than a single lump-sum figure — and on an island job, it's worth specifically asking how a contractor plans material delivery and crew scheduling around the ferry before comparing prices.
How Our Process Works
We keep the process straightforward, and on Lummi Island that means planning the logistics as carefully as the roofing details themselves.
- In-person inspection: We walk the roof and attic in person, not from a photo, and document exactly what we find.
- Written estimate: You get a clear, itemized bid covering tear-off, underlayment, flashing, ventilation, material selection, and cleanup — no vague single-line pricing.
- Material and crew planning: We order and stage everything the job needs in advance, so the crew isn't making unnecessary extra ferry trips mid-project for something that should have been on the truck the first time.
- Scheduling around weather: We build reasonable flexibility into the timeline, since wet-season delays are a normal part of working in this region and doubly so when the job site is only reachable by ferry.
- Tear-off and deck repair: Old roofing comes off completely, and any deck damage found gets addressed before anything new goes down.
- Underlayment, flashing, and shingle installation: Each layer goes on to manufacturer specification, with extra attention at valleys, penetrations, and wall transitions.
- Final walkthrough and cleanup: We review the finished roof with you, run a full magnetic nail sweep, and haul all debris off the island properly rather than leaving it for someone else to deal with.
Why Hiring a Crew That Already Works Lummi Island Matters
A crew that regularly works roofs on Lummi Island already understands the ferry schedule, knows how to stage a job so a forgotten part doesn't turn into a lost afternoon, and has seen firsthand how salt air, wind, and moss behave on this specific stretch of Whatcom County. That experience shows up in dozens of small decisions throughout a job — decisions a crew unfamiliar with island logistics might not think to make until something goes wrong.
It also matters after the job is finished. A workmanship warranty is only as good as the contractor standing behind it, and a company with an ongoing, established presence in the area is one you can actually reach if a question comes up two or three years down the road — not one that has to be tracked down or convinced to make the trip back out.
A Practical Checklist Before You Choose a Roofer
- Do they perform a full tear-off with deck inspection, not just a layover?
- Does the estimate specify underlayment type and shingle product, not just "new shingles"?
- Is flashing work at valleys, chimneys, and walls explicitly included in the bid?
- Do they explain how they plan material delivery and crew time around the ferry?
- Do they carry current WA contractor licensing, liability insurance, and workers' compensation?
- Does the bid separate manufacturer material warranty coverage from their own workmanship warranty?
Signs Your Lummi Island Roof May Need Attention
Asphalt shingle roofs rarely fail all at once — they give warning signs first, and catching them early is often the difference between a repair and a full replacement.
- Granules collecting in gutters, signaling shingles wearing thinner than they should
- Curling, cracking, or lifted shingle edges, especially on wind- and water-exposed slopes
- Dark streaking or moss buildup on shaded or north-facing roof planes
- Water staining on interior ceilings or in the attic near valleys or penetrations
- Visible sagging along the roofline, which can point to deck-level moisture damage
If you're seeing any of these signs, it's worth having the roof looked at before the next stretch of heavy weather rather than waiting for a leak to force the timeline — especially given how much harder an emergency repair is to coordinate on an island.
If you'd like an honest, no-pressure look at your Lummi Island roof and a written estimate to compare against anything else you've received, we're glad to plan the trip over and take a look. Use the form below to request a free estimate.