 Birch Bay Roofing
 New-Construction Windows Are a Different Job Than Replacement Windows
When a home in Blaine is being framed — whether it's a new build, an addition, or a section being rebuilt down to the studs — the windows going in are almost always new-construction units, not replacements. That distinction matters more than most homeowners realize. A new-construction window has a nailing flange around its perimeter that gets integrated directly into the wall's weather-resistive barrier (WRB) and flashing system before the siding ever goes on. A replacement window, by contrast, is built to slide into an existing opening without disturbing the surrounding trim or siding.
Because a new-construction window is installed as part of the building envelope itself, the install has to be sequenced correctly with the framer's and siding crew's work. Get the order wrong — siding before flashing, flashing before the WRB is lapped correctly, or fasteners in the wrong spot on the flange — and you've built a leak path into the wall that won't show up as a problem for a year or two, by which point it's hidden behind finished siding and drywall. On a Blaine build, where the wall assembly is going to face driving rain off the water for decades, that sequencing isn't a formality. It's the whole job.
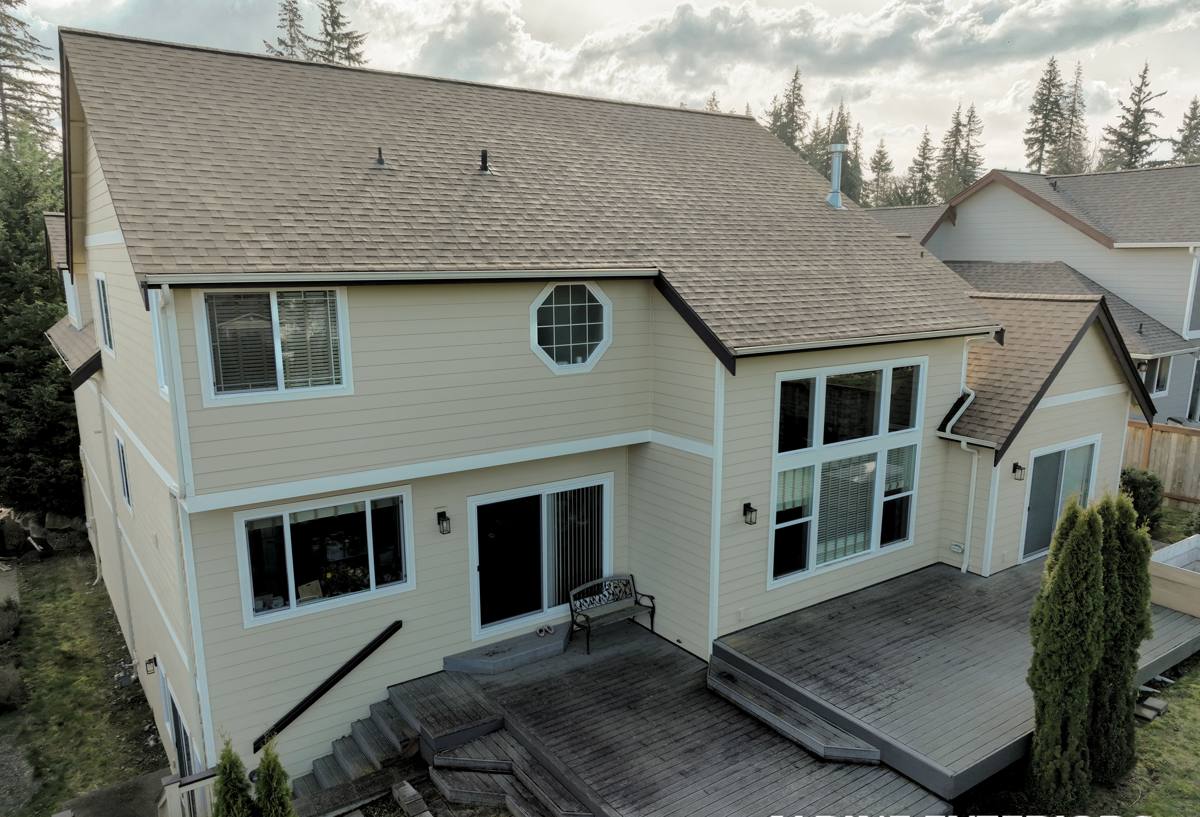
What Blaine's Climate Actually Asks of a Window Install
Blaine sits on the water at the north end of Whatcom County, and that location shapes what a window assembly has to hold up against. Homes here deal with wind-driven rain that doesn't just fall straight down — it gets pushed sideways into wall assemblies during winter storms, which is exactly the condition that exposes a sloppy flashing job. There's also a salt component to the air near the shoreline that speeds up corrosion on unprotected fasteners, hinges, and hardware over time. And like most of the Puget Sound and Salish Sea region, Blaine gets a long stretch of the year where humidity stays high and surfaces rarely fully dry out — the same conditions that grow moss and algae on roofs also encourage mold and mildew on window sills, trim, and any wood left exposed to the weather.
None of that means windows in Blaine need to be exotic or over-built. It means the basics — flashing, drainage, fastener selection, and frame material — need to be handled correctly and without shortcuts, because this climate doesn't forgive a marginal install the way a drier region might.
Getting the Flashing and Water Barrier Sequence Right
Most window leaks that show up years later trace back to one of a handful of sequencing mistakes made during the original install. On a new-construction opening, the water management plan has to work as a system — every layer has to shed water onto the layer below it, all the way down and out of the wall.
Sill Pan First
Before the window ever goes in, the rough opening needs a sloped sill pan so any water that does get past the window has somewhere to go besides straight into the framing. This step gets skipped more often than it should, especially on tight build schedules.
Side and Head Flashing, Lapped Correctly
Flashing tape at the jambs has to be applied over the sill pan and under the WRB. Head flashing goes over the window flange and gets lapped under the housewrap above it — never the reverse. If that lap order is backwards anywhere in the sequence, water runs behind the barrier instead of over it.
Fastening the Flange
Nailing flanges get fastened per the window manufacturer's pattern and fastener spec, not just "enough nails to hold it." Over- or under-fastening a flange can distort the frame slightly, which affects how the sash seals for the life of the window.
Here's the sequence we check on every new-construction install, whether we're the ones doing the framing coordination or stepping in after the rough opening is already built:
- Rough opening squared, level, and sized to the window manufacturer's tolerance
- Sloped sill pan installed and tested for drainage before the window is set
- WRB in place and cut correctly around the opening (not just stapled over it)
- Window set, shimmed, and checked for square before fastening
- Flange fastened per manufacturer spec — right fastener type, right spacing
- Jamb and sill flashing lapped correctly over the pan and under the WRB
- Head flashing installed last, lapped under the upper WRB
- Interior air seal (backer rod and sealant, or low-expansion foam) completed at the gap between frame and framing
- Final walk-through check for gaps, unsealed penetrations, or flashing tape that's lifted or wrinkled
Choosing a Frame Material for a Coastal Whatcom County Home
Frame material is one of the few decisions on a new-construction window that's mostly about long-term ownership rather than the install itself. All of the mainstream options can perform well in Blaine's climate — the trade-offs are about maintenance, how they age near salt air, and upfront cost.
| Frame Material | How It Handles Salt Air & Moisture | Maintenance | Typical Cost Position |
|---|---|---|---|
| Vinyl | Won't corrode or rot; performs well in coastal conditions | Low — occasional cleaning | Most affordable |
| Fiberglass | Very stable, resists expansion/contraction and moisture damage | Low | Mid to upper range |
| Aluminum-clad wood | Good exterior protection, but any breach in the cladding exposes wood to rot | Moderate — cladding seams need periodic checking | Upper range |
| Bare aluminum | Prone to corrosion and pitting in salt-exposed coastal air over time | Higher — needs monitoring for corrosion | Varies |
For most Blaine builds, we steer homeowners toward vinyl or fiberglass frames precisely because they don't give salt air and moisture anything to work on. Wood-framed windows can still be the right call for a specific look or a period-style build, but we're honest about the added maintenance commitment that comes with keeping wood protected this close to the water. That's not a knock on wood windows — it's just a real trade-off worth knowing before you order.
Glass and Hardware Specs Worth Paying Attention To
Beyond the frame, a few performance details matter more in this climate than they might inland:
- Low-E coatings reduce heat loss through the glass, which matters through Blaine's damp, overcast winters when the marine layer keeps temperatures cool and humidity high.
- Argon or krypton gas fill between panes improves insulating performance and helps reduce interior condensation on cold, humid days — a common complaint in coastal homes with older single-pane or poorly sealed windows.
- Condensation resistance rating is worth asking about specifically if the home sees a lot of interior humidity (cooking, showers, a home with young kids drying a lot of laundry) combined with cold snaps.
- Corrosion-resistant hardware — stainless or coated fasteners, locks, and hinges — holds up better than standard-grade hardware when a home sits within a mile or two of the water.
- Multi-point locking hardware on larger operable units helps keep the sash compressed evenly against the weatherstripping, which matters more on a wall that regularly takes wind-driven rain.
We don't push homeowners toward a specific manufacturer — there are several reputable window makers building solid vinyl and fiberglass units suited to Pacific Northwest coastal conditions, and the right pick usually comes down to your budget, the style of the build, and lead times. What we do insist on is matching the glass package and hardware grade to the exposure the window will actually see, rather than defaulting to whatever's cheapest to order.
Coordinating With Your Builder or Framer
On a new-construction project, window install timing is dictated by the framing and siding schedule, not the other way around. We work directly with the general contractor or framing crew to confirm rough opening sizes before windows are ordered — resizing an opening after a window has already shipped is a delay nobody wants. Lead times on windows can run several weeks depending on size, glass package, and manufacturer, so getting accurate measurements locked in early keeps the rest of the build on schedule.
We also coordinate directly with whoever is installing the WRB and siding, since the flashing sequence spans all three trades. A window installed correctly but tied into a housewrap that was lapped backwards is still a leak waiting to happen — so on jobs where we're not doing the housewrap ourselves, we walk the opening with the crew that is, before the siding goes up and covers the evidence either way.
Our Installation Process, Step by Step
- Site visit and rough opening review. We confirm opening sizes, check for square and level, and flag anything that needs correcting before windows are ordered.
- Window selection and ordering. We go over frame material, glass package, and hardware options based on the home's exposure, then place the order with enough lead time to keep the build on schedule.
- Pre-install prep. Sill pans, jamb flashing, and WRB integration are staged and reviewed before a single window is set.
- Setting and fastening. Each window is shimmed level and square, then fastened to the manufacturer's spec — not just nailed off to get it done.
- Flashing and air sealing. Head flashing, exterior sealant, and interior air seal are completed and checked window by window.
- Final walk-through. We inspect every opening for gaps, wrinkled tape, or anything that needs correcting before siding closes the wall up.
Why a Crew That Already Works Blaine and Birch Bay Matters
A lot of window installation knowledge is generic and travels fine from one region to another. But some of it is specific to building this close to the water in Whatcom County — how much more exposure a waterfront or near-waterfront lot gets compared to a lot a half-mile inland, how local building departments want flashing details documented at inspection, and how much wind-driven rain a given orientation is realistically going to see through a Pacific Northwest winter. A crew that works Blaine and Birch Bay regularly has already seen how these homes perform a few years after the siding goes up — which details actually mattered and which ones were just extra steps for no real benefit.
That local track record also means fewer surprises during inspection. We know what Whatcom County inspectors are looking for on a flashing detail, and we build to that standard the first time instead of re-doing work after a failed inspection slows the project down.
Caring for New Windows Once They're In
A correctly installed window in this climate should need very little from you, but a few habits extend its life:
- Rinse salt film off frames and glass periodically if the home is close to the shoreline — salt residue left to sit can dull finishes and accelerate hardware wear.
- Check weep holes at the bottom of the frame each fall to make sure they're clear of debris, so water draining out of the frame has somewhere to go.
- Watch north- and shade-facing sills and trim for early moss or algae growth during the wetter months, and clean it off before it holds moisture against the frame long-term.
- Re-caulk exterior sealant joints if you notice cracking or separation — this is a five-minute check that prevents a much bigger repair later.
If you're planning a new build, an addition, or a project in Blaine or elsewhere around Birch Bay that involves new-construction window openings, we're happy to walk the site, look at your plans, and give you a straightforward, no-pressure estimate using the form below.